
The making of Barad-Dûr
Part one – Page two
© Lotrscenerybuilder 2009
II. ‘By some great disquiet within’
By the end of 2004 we felt brave enough to give it a try and fabricate a scale model of the Barad-dûr (little did we know at the time that, eventually, this would lead to an extended collection of homemade LOTR miniatures!). If memory serves us well, building this first version, combined with a model of the Black Gate, took barely three weeks time; we ‘cunningly’ used a few dozens of wooden clothes-pegs to imitate the irregular features of the tower. It wasn’t our intention to produce an exact copy of the Weta miniature. We only wanted to surprise our son with an acceptable lookalike (see also: Part I of “The Sawdust of the Past”).

The way in which this very first lotrscenerybuilder model was constructed would act as a blueprint for our future Barad-dûr II. Already there was a cardboard tube at the core, surrounded by vertical pillars of timber to imitate the Brueghelian ‘Tower-of-Babel’-structure at the tower’s base; individual wall-elements at every level were separately built and finished before getting fixed to the model. Also, the sequence of the various building steps would practically be the same: working top-down, we started with the cutting of the two horns and ended with the modelling of the polyurethane rocks. And somewhere near the topmost pinnacle, almost five years ago now, we glued our maiden-pricker…
Quite a few models followed – including a ‘Tower of Orthanc’ – before we started to build scenery in a more serious way. It wasn´t before our approach of the advanced versions of the ‘Chamber of Mazarbul’ that we tried to attain a faithful resemblance to the movie images. With various degrees of success. But the more Middle-earth miniatures we finished – ‘Cirith Ungol’, ‘Sandyman’s Mill’, ‘The Argonath’ – the more our Dark Tower looked out of tune.
Eventually, during the DIY-production of ‘The Black Gate’ in the last months of 2008, the urge to correct our Shoddies from the Past became irresistible. Or, as Steve ‘Onyx’ put it when we showed off our brand-new Barad-dûr II on TheLastAlliance-site: “It was only a matter of time…”
Barely two weeks after finishing the Morannon Project we found ourselves There and Back Again.
III. ‘The iron crown of the topmost tower’ (April 11 – 28, 2009)
In the old days of Mazarbul & Khazad-dûm we just started to mess about with a piece of MDF, without much of a plan. Nowadays, before we pick up a pencil, a knife or a saw we muse for hours behind our desk on the upcoming workload: where to find all the necessary information (images), where to find suitable materials (tubes with the correct diameter), where to store the next, ever expanding building site (on top of all others)? But more so about: do we really want to commit ourselves again for weeks on end to yet another complex and time-consuming enterprise? Some of you might recognize this wavering…
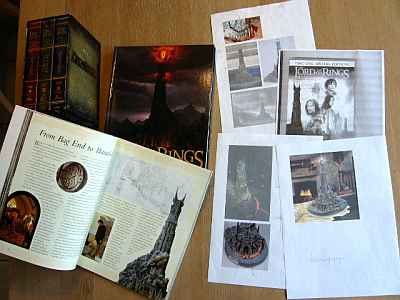
During the ‘preparation-stage’ – which was more like putting off the evil hour – we scanned the world wide web once more for usable pictures. Apart from the odd movie still we stumbled upon a few pictures of the Sideshow polystone cast of Barad-dûr; they came up with a lot of details from the Dark Side of the Tower. Besides, we consulted the usual LOTR-hobbyist’s Bibles: the Appendices of the LOTR Extended DVD-set, Brian Sibley’s “The Making of the Movie Trilogy” and Gary Russell’s “The Art of the Return of the King”.
For the first version of Sauron’s Tower we had used a cardboard tube with a diameter of 4inches/10,4cm. This time, we wanted to build on a slightly smaller scale; therefore, we chose a tube with a diameter of 3inches/7,4cm for the central core (we’re always on the lookout for ‘basic’ materials such as tubes, cardboard sheets and party-sticks; this tube had been waiting for ages between jackets & dresses before coming out of the closet).
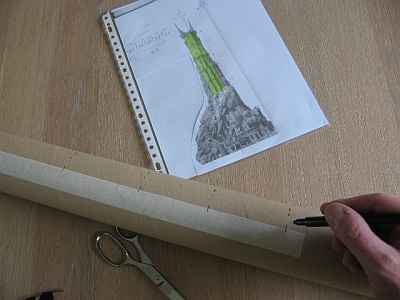
First thing we did was to mark out the different levels on the tube. For this we compared the width of the cylinder to the width of the tower in a picture of Barad-dûr (in: Sibley, page 55). This ratio became the standard for all further conversions. Next, we scaled up all distances proportionally (it is all simple mathematics).
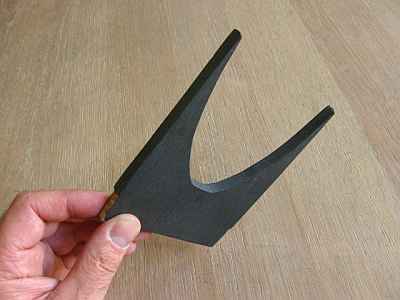
At the time we’d simply cut out the shape of these Twin Peaks from a piece of fibreboard to create the topmost pinnacle. Nailing the correct silhouette took quite a few efforts though; the gap between the horns isn’t a randomly chosen crescent but has approximately a parabolic form. After a while, we changed these initial horns for an improved set – still 2D – which to this day crowns the 1st-version.
(Actually, the shown object is the very first LOTR-related particle we produced, three-thousand years ago; nowadays it has the pride of place in our Mathom-house, along with the aforementioned Maiden-Pricker which was cut from Sauron’s Iron Crown and replaced by an ordinary party-stick).
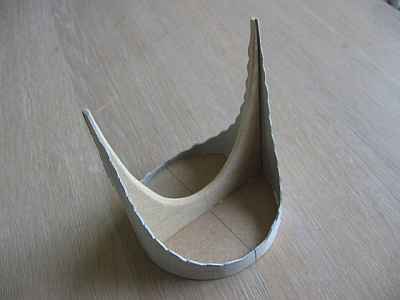
This time, we wanted to make a 3-D set of horns, true to the Weta model. The picture shows our first attempt to create a spatial framework that answered to the distinctive silhouette from all directions. In the end, the ridgy contours didn’t work, nor was our quadratic equation for the crescent Sauron’s. But the approach proved to be practicable.
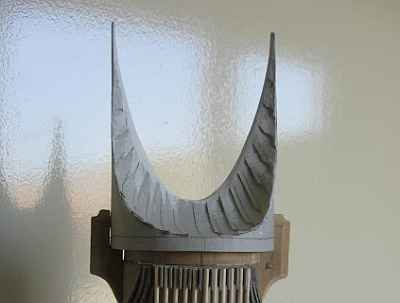
With the framework to our liking, we created a mantle by using small strips of cardboard.
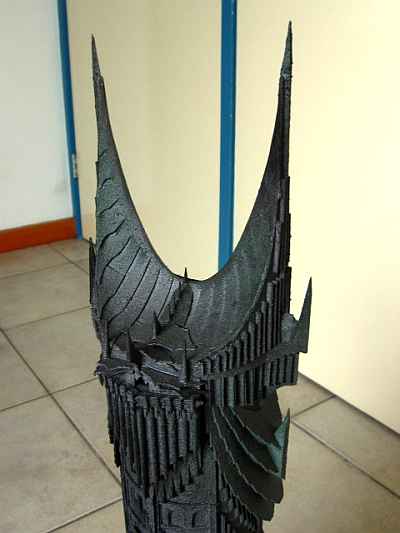
Once painted black, the shadowy effects of these strips would provide the horny relief – “beg your pardon?” – on the surface of the mantle. The picture shows the finished crown, with all the metal plating and spikes on top. The vertical 2mm cardboard strips against the outside were only added in the final stage.